


How to Soundproof Your Home with DIY Acoustic Panels (No Tradies Required)


If you've ever recorded a video call and cringed at the echo in your own voice, tried to concentrate in a home office that sounds like a gymnasium, or sat down to record a podcast only to hear your walls talking back to you — you already know the problem.
Bad room acoustics aren't a minor inconvenience. They affect how you sound on calls, how clearly you can think, how your music or recordings translate to the outside world, and even how comfortable a space feels to simply be in. The good news? You don't need to hire a tradesman, pull walls apart, or spend a fortune to fix it.
DIY acoustic panels have come a long way. Today's options are stylish, genuinely effective, and — critically — easy enough for anyone to install on a weekend with nothing more than clean hands and a spirit level. This guide will walk you through everything: the science, the strategy, the products, and the exact steps to treat your home the right way.
First, Let's Clear Up a Common Misconception
Before we go any further, it's worth separating two terms that get confused constantly, even by people who've been researching this for a while:
Soundproofing means blocking sound from entering or leaving a room. It requires mass, seals, and often structural changes — think solid-core doors, acoustic seals around frames, and double-glazed windows. It's primarily a construction solution.
Acoustic treatment means controlling how sound behaves inside a room. This is what acoustic panels do. They absorb sound waves, reduce echo and reverberation, and improve the overall quality of sound within the space.
For most homes, home offices, podcast setups, and music studios, acoustic treatment is what you actually need — and it's entirely achievable with DIY panels. If you're hearing your voice bounce back at you, if calls sound echoey, if recordings feel "roomy" — that's a treatment problem, not a soundproofing problem.
Why Does Your Room Sound Bad?

Left: untreated room with reflective surfaces. Right: acoustic panels absorbing sound waves before they reflect.
Sound travels in waves. When those waves hit a hard, flat surface — a plasterboard wall, a glass window, a timber floor — they bounce back into the room. In a space with parallel walls and minimal soft furnishings, those reflections pile on top of each other and on top of the original sound, creating what we hear as echo, reverb, or that muddy, unclear quality that makes rooms feel acoustically "live."
The physics are actually straightforward:
- Echo is a distinct repetition of a sound you can clearly hear
- Reverberation is the blending of multiple reflections that make sound feel "washy" or unclear
- Flutter echo is that rapid ping-pong effect you hear when you clap between two parallel walls
Acoustic panels work by absorbing those sound waves instead of reflecting them. The material converts the sound energy into a tiny amount of heat energy — gone, rather than bounced. The result is a "dead" or "dry" acoustic environment where you hear the sound source clearly, without the room colouring it.
Understanding NRC: The Number That Actually Matters
Every acoustic product carries an NRC rating — Noise Reduction Coefficient. This is a number between 0 and 1 that tells you what percentage of sound a material absorbs across the key speech and mid-frequency range (250Hz to 2000Hz).
| NRC Rating | What It Means |
|---|---|
| 0.0 | Perfectly reflective — absorbs nothing (e.g. glass, concrete) |
| 0.25 | Absorbs 25% of sound energy |
| 0.45 | Absorbs 45% of sound energy — solid mid-range performer |
| 0.85 | Absorbs 85% of sound energy — high-performance absorption |
| 1.0 | Theoretically absorbs all sound (used as reference only) |
A practical note: You don't need to cover every surface with 0.9+ NRC panels to get a great-sounding room. For most home offices and podcast setups, an NRC of 0.40–0.50 across strategically placed panels delivers a noticeable, professional result. For dedicated music studios or critical listening environments, you'll want to push higher — and think about low-frequency treatment too (more on that below).
The 3 DIY Acoustic Panel Options Worth Knowing About
At Acoustic Sound Products, we carry Australia's widest range of acoustic solutions from the country's leading brands — Autex, Acoufelt, and Acoustek. For home and small studio DIY installations, three products stand out as the smart choices: genuinely effective acoustics, no special tools or trades required, and designs that look intentional rather than like an afterthought.
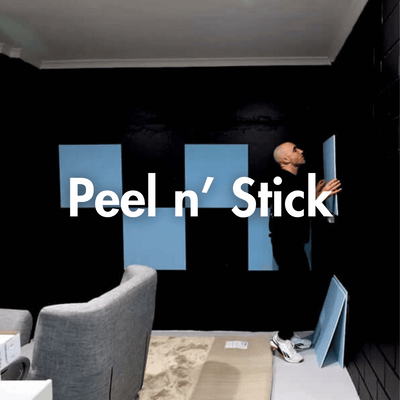
1. Autex Composition Peel n Stick Acoustic Tiles

The benchmark DIY acoustic tile in Australia. The Autex Composition Peel n Stick tile is a 600mm × 600mm, 12mm thick panel made from 100% polyester fibre — with a minimum of 60% post-consumer recycled content. It delivers an NRC of 0.40, which is comfortably effective for voice, conversation, and general room treatment.
What makes it the go-to for home and office use:
- True peel-and-stick installation — the hook-and-loop backing means no spray adhesive, no dry time, no damage to walls
- Pinnable surface — the self-healing pile lets you pin notes, prints, or materials directly to the panel
- 39 colour options — from neutrals like Cavalier and Vintage to accent colours like Blazing Red and Jade
- Fire rated — AS ISO 9705: Group 1, suitable for residential and commercial environments
- No VOCs, no safety equipment needed during installation
This is the right choice for a home office treatment project, a feature wall behind a desk setup, or anyone who wants a clean, professional-looking result that took an afternoon to install.
Best for: Home offices, content creator setups, general room treatment, feature walls
Shop Autex Composition Peel n Stick Tiles → | Shop Bulk Pack →
2. Acoufelt Fracture Wall Tiles

Where the Composition tile is clean and minimal, the Fracture tile is a design statement. Made from FilaSorb — a premium acoustic felt material with over 80% recycled content — Fracture tiles feature geometric bevelled patterns that create depth, shadow, and texture on your wall.
The tiles are modular: you can orient them in different directions to create a range of full-scale patterns — or mix colours for a two-tone effect. Each carton covers 3.24m², and they install with peel-and-stick backing.
Acoustic performance is strong: NRC of 0.45 standard, with the premium V30 specification achieving up to NRC 0.85 — making this one of the highest-performing DIY options available in the Australian market.
Available patterns include: Barcode, Leadlight, Illusion, Motif, and Grid — each creating a completely different visual outcome from the same modular tile system.
Best for: Podcast studios, music rooms, home theatres, anyone who wants acoustic treatment to look like intentional interior design
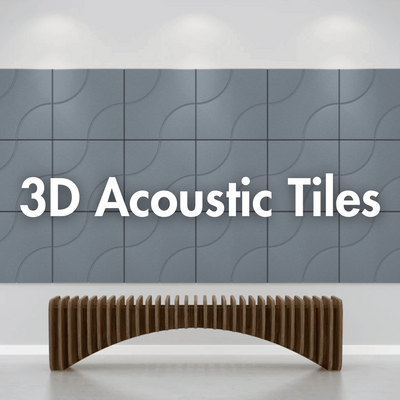
3. Acoufelt QuietForm 3D Acoustic Tiles

If you want walls that stop conversations in their tracks — for the right reasons — the QuietForm 3D range is it. These are sculptural acoustic tiles: soft, undulating three-dimensional surfaces that absorb sound while functioning as a genuine architectural feature.
The QuietForm range includes styles like Celestial (soft wave-like curves) and Flute (clean, linear channels), each with an NRC of 0.45 and Peel n Stick installation. Available in 44 colours, 60%+ recycled content, and low VOC.
The 3D profile isn't just visual — a contoured surface creates more surface area for sound absorption than a flat panel at the same footprint, and the varied angles help scatter and absorb reflections across a wider frequency range.
Best for: Music studios, podcast rooms, premium home office setups, feature walls with a strong design brief
Side-by-Side Comparison
| Autex Composition Peel n Stick | Acoufelt Fracture | Acoufelt QuietForm 3D | |
|---|---|---|---|
| NRC Rating | 0.40 | 0.45–0.85 | 0.45 |
| Installation | Peel n Stick | Peel n Stick | Peel n Stick |
| Recycled Content | 60%+ | 80%+ | 60%+ |
| Colour Options | 39 | Multiple | 44 |
| Pinnable Surface | Yes | No | No |
| Fire Rated | Group 1 | Yes | Yes |
| Design Profile | Flat — clean & minimal | Geometric / textured | 3D sculptural |
| Best Use | Office, general treatment | Studio, feature wall | Studio, premium spaces |
Where to Place Your Acoustic Panels: A Room-by-Room Strategy
Even the best acoustic panel in the wrong position will underperform. Here's how to think about placement for the three most common home applications.

Priority panel placement positions: side wall first reflection points, the wall behind your monitor, and the rear wall behind the mic or listening position.
Home Office
The goal in a home office is a clean, clear sound environment — for calls, concentration, and general comfort. You're not necessarily aiming for a "dead" room; you want controlled, natural sound.
Priority placement:
- Behind your monitor — the wall directly facing you as you work is the primary reflection surface
- Side walls at desk level — sound from your speakers or your voice bounces off these walls directly toward your ears and your microphone
- The wall behind you — if you're on video calls, this is also your visual backdrop. Treatment here serves double duty
A common starting point for a home office is 6–10 tiles (at 600mm × 600mm, that's 2.16m² to 3.6m² of coverage). Start with the wall behind the monitor and the two side walls at desk height, then assess.
Podcast Studio or Recording Space
For recording spoken word — podcasts, voiceovers, YouTube content, online courses — the acoustic standard is strict. Any reverb or flutter echo is immediately audible in a recording, and it's very hard to remove in post-production without degrading voice quality.
Priority placement:
- First reflection points on side walls — use the mirror trick: sit in your recording position, have someone hold a mirror against the side wall, and mark wherever you can see your microphone in the reflection. That's your first reflection point — cover it.
- Wall directly behind the microphone — critical. Reflections from behind the mic feed directly back into the capsule
- Ceiling above the recording position — overhead reflections are frequently underestimated and make a significant difference to recording quality
- Corners — if you're noticing bass buildup or a "boomy" quality, corner treatment is the next step
For a typical small podcast room (3m × 3m or similar), expect to need 12–20 tiles to get to a professionally dry recording environment.
Home Music Studio
A home music studio has the most demanding acoustic requirements of the three. You need the room to be controlled enough to make accurate mixing decisions, but not so dead that it loses its character or makes recording instruments feel sterile.
Priority placement:
- Corners first — bass frequencies accumulate in corners. This is where the Fracture V30 tiles (NRC 0.85) or stacked panels earn their place
- First reflection points on side walls (as above)
- Rear wall behind the mix position — a mix of absorption and diffusion here helps create a more accurate stereo image
- Ceiling above the mix position — a panel array angled down treats ceiling reflections without making the whole room feel closed in
The Mirror Trick — how to find your first reflection points: Sit in your listening or recording position. Have someone slowly move a small hand mirror along the side wall at ear height. Wherever you can see your speakers (or microphone) reflected in the mirror, that spot is a first reflection point. Mark it with tape. That's where your panels go first.
How Many Panels Do You Actually Need?
Use this as a starting guide — these are starting points, not final answers. Acoustic treatment is iterative: treat the priorities, listen, and add from there.
| Room Type | Room Size | Starting Panel Count | Coverage (approx.) |
|---|---|---|---|
| Home office | Small (up to 12m²) | 6–8 tiles | 2.2–2.9m² |
| Home office | Medium (12–20m²) | 8–12 tiles | 2.9–4.3m² |
| Podcast room | Small dedicated space | 12–16 tiles | 4.3–5.8m² |
| Music studio | Small (up to 15m²) | 16–24 tiles | 5.8–8.6m² |
| Music studio | Medium (15–25m²) | 24–36 tiles | 8.6–13m² |
Step-by-Step Installation Guide

Installing peel-and-stick acoustic tiles is genuinely straightforward. Here's the process done properly.
What you'll need: Your tiles, a tape measure and pencil, a spirit level, a clean dry cloth, and optionally some low-tack painter's tape for layout planning.
Step 1 — Clean the wall surface. Wipe the wall with a clean, dry cloth to remove dust and any grease. If the wall has been recently painted, allow at least 28 days cure time before applying. The cleaner and smoother the surface, the stronger the adhesion.
Step 2 — Plan your layout before you stick anything. Use painter's tape to mark out your panel positions on the wall first. Step back and review. Adjust. It's much easier to reposition tape than repositioned panels. If you're creating a pattern with Fracture tiles, lay them out on the floor first to confirm the arrangement.
Step 3 — Start from a fixed reference point. For a symmetrical layout, find the centre of the wall and work outward. Use your spirit level on each tile as you go — even a slight angle compounds across multiple tiles and becomes visible.
Step 4 — Peel and press firmly. Remove the backing, position the tile, and press firmly across the entire surface — not just the centre. Pay particular attention to edges and corners, as these are where peel-backs start if not properly pressed.
Step 5 — Allow 24 hours before stress-testing. The adhesive continues to bond over the first 24 hours. Avoid hanging anything from the tiles or pressing hard against them during this period.
Step 6 — Assess acoustically. Clap sharply in the centre of the room. In an untreated room you'll hear a distinct flutter or ring. After treatment, that ring should shorten and soften noticeably. Record your voice before and after — the difference will be immediate.
Common Mistakes to Avoid
Treating only one wall. Sound bounces between all surfaces. Treating a single wall often just shifts the problem rather than solving it. Cover the primary reflection points across multiple surfaces.
Placing panels too high. Acoustic panels work at ear level — for a seated listener or speaker, that's typically 900mm to 1500mm from the floor. Panels placed at ceiling height look impressive but treat sound where it matters least.
Ignoring corners. Corners are where bass frequencies accumulate. If your room sounds boomy after standard panel treatment, corners are the next priority.
Over-treating. A room that's too acoustically dead sounds unnatural and fatiguing to work in. You're aiming for controlled, not silent. For most home spaces, 20–30% wall coverage is a reasonable acoustic goal.
Buying on aesthetics alone. A great-looking panel with a low NRC rating is just decoration. Always check the NRC before purchasing. Every product in our DIY range carries verified NRC data — contact our team if you need help reading a spec sheet.
Frequently Asked Questions
Will acoustic panels stop my neighbour from hearing me?
No — and this is the most important distinction to understand. Acoustic panels treat sound inside the room. They reduce echo and reverberation, which can make recordings sound cleaner and reduce the perceived "loudness" within a space, but they will not prevent sound from transmitting through walls to adjacent rooms. That requires soundproofing measures — structural mass, seals, and separation.
Can I remove the panels if I move?
The peel-and-stick backing on Autex and Acoufelt tiles is designed for semi-permanent installation. Removal is possible, but there is some risk of surface damage depending on your wall finish and paint quality. If you're renting, speak to our team about the best approach for your situation before installing.
Do acoustic panels work on ceilings?
Yes — and ceiling treatment is frequently underestimated. Overhead reflections contribute significantly to reverb in a room. The Autex Composition tiles can be applied to ceilings with attention to adhesion and additional mechanical fixing in high-humidity environments. Speak to our team before installing on ceilings to get the right approach for your specific space.
What's the difference between acoustic panels and acoustic foam?
Acoustic foam (the wedge or pyramid foam commonly seen in studios) is a budget option that primarily absorbs high frequencies, doing very little for mid and low frequencies. Premium acoustic panels like the Autex and Acoufelt range treat a much broader frequency range, are more durable, look significantly better, and are made from safe, low-VOC materials — not the open-cell petrochemical foam that degrades and crumbles over time.
How do I know if I've used enough panels?
The clap test is your quickest guide — a sharp clap in the centre of the room should produce noticeably less ring and flutter after treatment. For recording work, record a short voice take and listen back critically on headphones. If you can still clearly hear the room in the recording, add more coverage to your primary reflection points.
Ready to Get Started?
You don't need a tradesman, a big budget, or a weekend of construction to transform how your home sounds. The right acoustic panels, placed in the right positions, make a difference you can hear immediately — whether you're joining your next Zoom call, hitting record on your podcast, or sitting down to mix.
Acoustic Sound Products is one of Australia's largest acoustic retailers, stocking the full Autex, Acoufelt, and Acoustek ranges with delivery nationwide. Our team understands acoustics at every level — from large commercial installations to exactly this kind of home setup — and we're here to help you get it right.
Explore our full DIY peel-and-stick range:
- Autex Composition Peel n Stick Tiles — the clean, reliable home office standard
- Autex Composition Bulk Pack — better value for larger coverage areas
- Acoufelt Fracture Wall Tiles — geometric, high-performance, design-forward
- Acoufelt QuietForm 3D Tiles — sculptural acoustic treatment for premium spaces
- Browse all DIY acoustic panels
Not sure where to start? Get in touch with our team — we'll help you choose the right products and coverage for your specific space, at no obligation.
Acoustic Sound Products is one of Australia's largest acoustic retailers, supplying Autex, Acoufelt, and Acoustek products to homes, studios, and commercial spaces nationwide. We provide professional installation for commercial projects and supply everything you need for a complete DIY home solution.